The Basics
To practice our music at home, we use a web-based application called Soundtrap.

Soundtrap looks and works the same on Windows and Mac. You can also download Soundtrap apps for iOS and Android devices, although they can be more challenging to use.
Every song on Soundtrap has its own project page; Mark creates these pages with guide tracks for each SATB part, much like the rehearsal recordings we formerly used.
Getting Started
At the start of the season, Mark sends each singer an email invitation to the Soundtrap project pages of the songs he wants us to rehearse.
Clicking the link will open your web browser to the Soundtrap site, and a box like this will pop up.

If this is the first time you’ve used Soundtrap, you’ll need to sign up with the service. Sign up with Google, Facebook, or your email address by clicking the appropriate link. (We use the free version, so there is no need to enter payment information at any time. If you see a dialog box requesting payment or suggesting you “Start your 1 month free trial,” click the X to make it go away.)
If you have previously used Soundtrap, click on the Already have an account link and sign in.
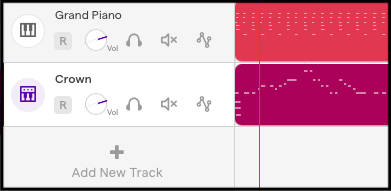
Once you have registered and signed in, you’ll be taken to your User Page, which lists all of the songs to which you’ve been invited. It will look something like this:

You can listen to any track from this page, but you won’t be able to adjust the levels of the various parts, and stopping and rewinding will be a pain. For more precise control, click on the Studio button on the right-hand side of the song you want to practice. That will take you to …
The Project Page
This page offers a detail look at, and fine-tuned controls for, a specific song. It looks like this:
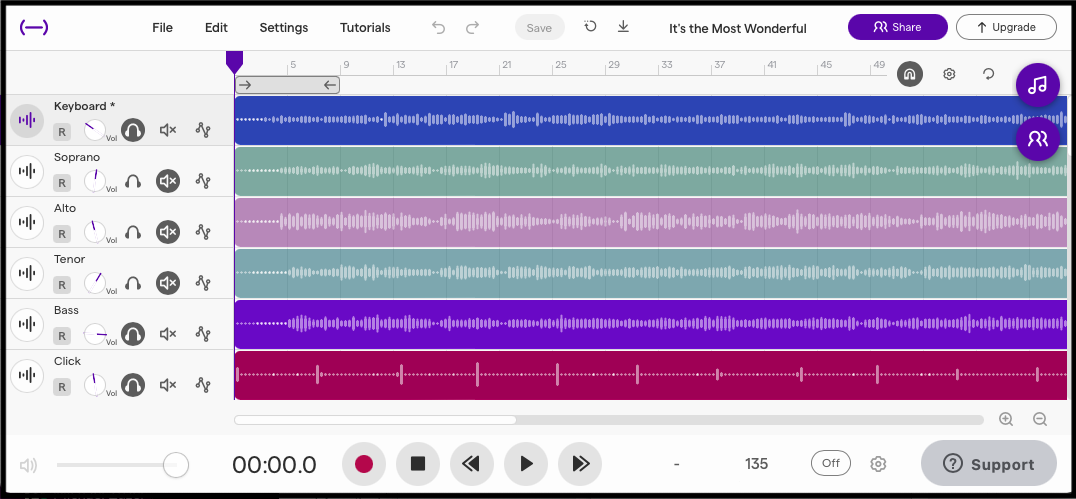
The Soundtrap project page is a visual representation of the song. The purple downward arrow is the “play head,” moving from left to right as the song plays. There is a different colored stripe for each SATB part. In the left column are the names of the individual parts.
Under each track’s name are controls you can use to customize your rehearsal experience. From left to right, they are:
-
- Record (red dot icon): Don’t ever click this. If you ever note that the box has turned red, click it again so it is gray.
- Volume (one-handed clock icon): Click and hold on the circle, then drag up or down to adjust the volume of a specific track.
- Solo (headphones icon): Click this to hear a specific track.
- Mute (speaker with x icon): Click this to mute a specific track.
- Pay no attention to the squiggle icon on the right, which we don’t use.
Along the bottom next to the time display are round buttons for (left to right) Record, Go to Beginning/Stop, Skip Back, Play, and Skip Forward. Again, don’t ever click Record (red dot icon).
The Master Volume control on the far left adjusts the volume of all tracks simultaneously.

Conducting Your Rehearsal Session
-
- Decide which tracks you want to hear as you practice the song. You may wish to start with only your own SATB part and accompaniment (if any), and add the other parts once you’ve learned your own.
- Click the Play button (the right-facing arrow icon) and listen to the tracks you’ve selected. You can adjust the volume of individual tracks with the Volume control (the one-handed clock icon) underneath the name of each track. Adjust the overall volume with the Master Volume control at the bottom left.
- If you want to start again from the beginning, click Stop (square icon) and then Go to Beginning (left-facing arrow with the vertical line icon). If you want to skip to a specific section of a song, you can either move the playhead (purple downward arrow at the top) or use the Skip Back or Skip Forward buttons at the bottom.
- When you are finished rehearsing a particular song, click the Exit button in the top right corner. You’ll be taken back to the list of songs we’re working on. If a dialog box asks if you want to save changes, click Don’t Save. If it asks whether you’re sure you want to leave the page, click Leave Page. Never click the Save button at the top of the page or anywhere else.
Notifications
If you’re tired of receiving emails from Soundtrap every time another singer works on a project, you can easily disable notifications:
-
- In the upper left hand corner of the screen, click on the three dots next to your user name.
- Select Settings.
- Scroll down to the Notifications section and de-select the types of messages you do not want to receive. IMPORTANT: Do not de-select the email checkbox after “I receive a request to collaborate.” This is how Mark invites you to a project.
- Click Save.
- Click the arrow in the upper left corner to return to your project dashboard.
Questions? Problems? Your tech support staff wants to hear from you. Email Howie (howie.seay@gmail.com) or Michael (michaelzuzel@icloud.com).